The rebirth of a Holton 345 has started...

The bulk of the musical talk
Post Reply
TubaSteve
bugler
bugler
Posts: 156
Joined: Mon May 09, 2005 2:38 pm
Location: SE Wisconsin

ue

Post by TubaSteve »

[quote="bloke"]bright gold / satin silver is a very old finish...typically the "top" finish (except for the ultimate "all gold / extra engraving") that the American manufacturers of the past offered...

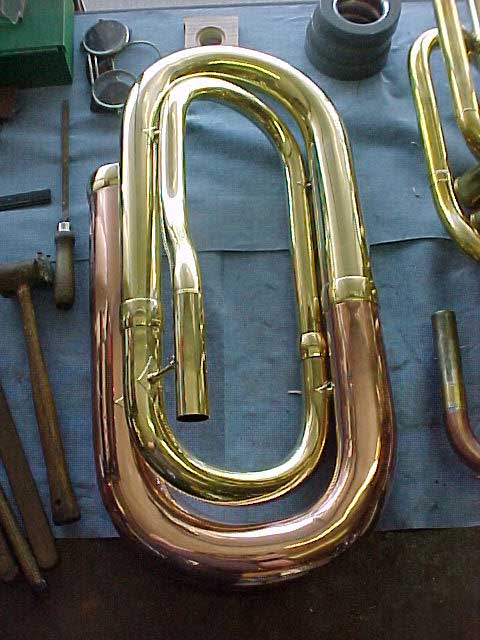
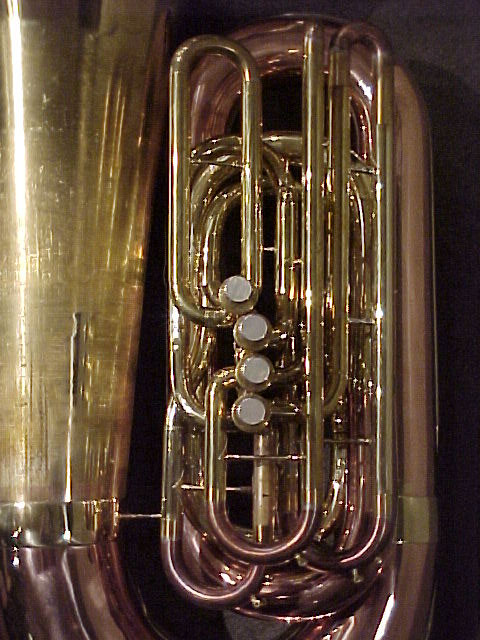
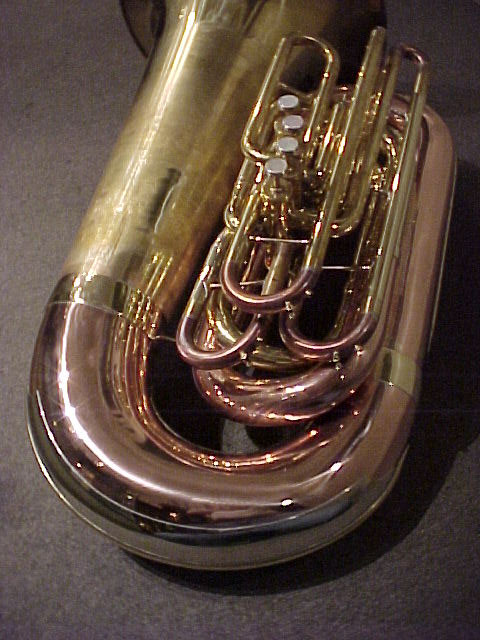
...Gold bell interiors on sousaphones were the "norm" rather than "the exception" on silver plated sousaphones. The reason that most "overhauled" and brand-new satin-silver sousaphones don't have gold bell interiors is because it costs the repair shop or factory an extra $150 or so, and thus folks got accustomed to seeing most satin-silver sousaphones with bright silver (rather than the traditional gold) bell interiors. Most of the "old-old" satin silver sousaphones with their ORIGINAL silver and no gold interiors actually ORIGINALLY had gold interiors that have been buffed down to the silver...Dents/repairs distressed the gold so much that these instruments looked better with the gold removed (by repair shops...but only by qualified N.A.P.B.I.R.T. shops :shock: ). Gold is a pretty handy finish for the bright surface areas (the areas that are typically handled more) because gold stays "clean" so much longer and it "cleans up" so much easier...At least gold doesn't "blacken" as does silver. Admittedly, gold slides/caps/buttons were mostly only found on silver trumpets, but the finish was a regular offering during the "great era of American band instrument manufacturing". (How's that for some b.s.?) King had the "gold slides / silver body" finish pictured on one of their baritone horns (on their promotional march music cardboard folders) as late as the early-mid 1970's.

Once again, opinions are a lot like (_!_)'s.

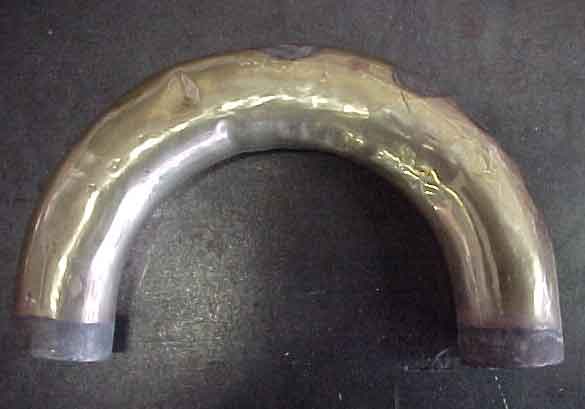
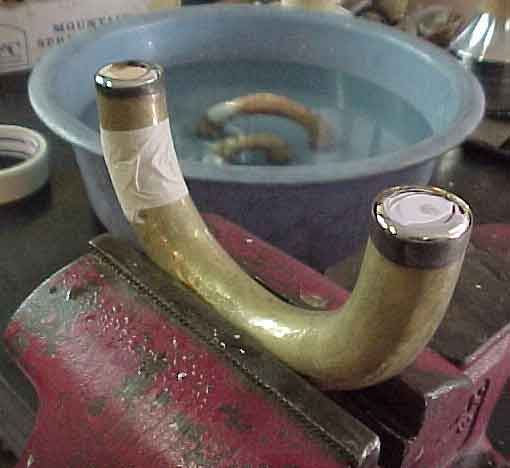
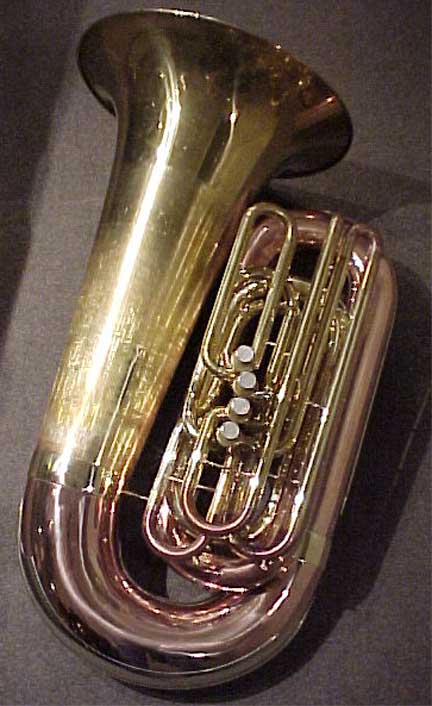
[ Bloke; I have a question for you. I have an old Holton Sousa bell that has a gold colored interior, and a matt silver outer with bright silver in the decorations areas. Would you guess this be a gold plated interior or the brass plated lacquer? It is still in fairly decent shape, and really don't know what to do with it.

This is all I have from the horn, too bad but the rest went to a landfill before I could find it and save it. Long story, but the short version is that it was liberated from the high school band room back in the early 70's to be covered with paper mache and used on a homecomming float. When the float was torn apart at a cheerleaders house, it was thrown in her dads garage and left there. When I was in high school, (77-79), I saw a photo of 6 of their brass horns that had been taken in ~1963~, and I went on a quest to find them. After looking and calling, searching I was able to find two complete Reynolds Contempora's, and the bell of the Holton. The cheerleaders dad got mad that it was laying in his garage and tossed the main body of the horn just a month or so before I found out where it had been left years before.

Steve
MW-25, 2-Reynolds 170 (BBb Recording Bass), Reynolds 180 (EEb Recording Bass) , 2-Reynolds 140 Sousaphones, Holton 350, others.....
User avatar
Daniel C. Oberloh
pro musician
pro musician
Posts: 547
Joined: Fri Mar 19, 2004 9:22 pm
Location: Seattle Washington

Post by Daniel C. Oberloh »

Hi All,
I managed to spend a little time this past week on Dave's Holton and decided it was time to get started assembling the valve section. I had a rather serious issue to tend to, that being the tuning slide crooks that (like every other part of this horn) were completely screwed up! And like so many other problems with this horn, they were problems caused by folks with tools (sigh).

In addition, there were a number of missing braces that had been replaced with inproper bits and pieces of this and that. I had no spare Holton 345 replacement braces so I made what was needed to get the slides assembled to the valve block. Making the replacements was not a
real big deal but in order to make them the same look it took a good part of a Saturday afternoon to fabricate the sockets and flanges along with all the silver brazing and clean-up.

As for those pesky slide crooks, The entire 1st slide assembly was trashed, so I junked the works along with the slide tubes and built a whole new replacement assembly. I really only had to do serious battle with the 3rd and 4th bottom slides, the master slide and the dreaded 4th top slide crook. Quite the mess. They were all dented and stretched to hell. They also had cracks (dam!) Big problem, no spares to be had and not in any mood to make replacements from scratch and patching was to me, not an option. So I decided to address the tubes and ferrules and then get to work at salvaging the macaroni.

Image

As can be seen, this is one of the crooks. It had a little rot, common on the 345s. It will be tended too.

Image

From this perspective you can see the witness marks where cracks were covered up with soldered on patches. There was a good deal of distortion that I was not able to capture in the images shown. We will make this puppy right in time.

Image

After roughing out the dents in the crooks, I pulled them through some rounding rings, ground out and brazed shut the cracks and holes, the crooks were filled with a low temp . filler metal and cooled in a tub of water.

Image

With the tube filled, I am able to pushdown the stretched and bulging distortions through the use of heavy steel dent hammers and finally smoothing the hammer marks and uneven surface by employing (called Ausbogeisen in German) what we call "hammering blocks".

Image

I could have probably made replacement crooks or maybe even found some existing parts some where but through the use of such tools and a wee bit of skill, every now and then I am able to pull off a miracle and save time in the process. The crooks did need additional sanding after there radius was readjusted. They were then immersed in our double boiler and the filler melted and brushed out. The slides were then able to be assembled with the proper alignment and braces installed.

Image

The crooks are rather fragile and were the day they were originally made so now that the slide tube assemblies are mounted to the valve block, the heavily worked crooks will be removed, masked and given the acid copper treatment just like what was done to the large bows earlier. The 90o elbow (on the right) that comes out of the 4th valve into the tuning slide was beat to crap and was badly constructed the day it left the factory as was all of the 4th valve slide and branch assembly. It was a serious pain so I scrapped the elbow and managed to make it the way it should have been... Proper! :x Now it looks good and no on will even notice all the work I put into making it right. :(

Image

Oh yeah, the first slide was shortened so the C can be brought up to pitch. :) Okay Dave, theres your "fix" for June. :wink:


Daniel C. Oberloh
Oberloh Woodwind and Brass Works
www.oberloh.com
User avatar
Bandmaster
4 valves
4 valves
Posts: 778
Joined: Sat May 15, 2004 3:33 am
Location: Upland, CA
Contact:

Post by Bandmaster »

Thank you, thank you, thank you!!!! I was going through withdrawls, I needed this "fix"... Again, amazing work Dan! My day has been made again! All it needs now is an adjustable thumb ring.

I can't wait to get it back. Now that most of the hard stuff is done it should be much longer, right? :wink: (Hey, I can dream can't I?) I need to get up to Seattle and trade my York in for my Holton so I can get that one done next.
Dave Schaafsma
Image
1966 Holton 345 | 1955 York-Master | 1939 York 716 | 1940 York 702 | 1968 Besson 226 | 1962 Miraphone 186 | 1967 Olds | 1923 Keefer EEb | 1895 Conn Eb | 1927 Conn 38K | 1919 Martin Helicon
User avatar
The Big Ben
6 valves
6 valves
Posts: 3169
Joined: Sat Dec 16, 2006 11:54 am
Location: Port Townsend, WA

Post by The Big Ben »

harold wrote:Here's the inherent problem with this kind of job for those of you that are interested.

<cut>

In the end I'll have a nice 6/4 4 valve horn in silver plate with a case.

If I went to CMC I would expect to pay $17,000 - $22,000 for a simiar horn.
For about $11K and it will be a unique horn. You *know* it's right because you saw it being made right. And, at that price, it's a good deal, too. (If, for whatever reason, you are in the market for a horn of that caliber.)

I think it is easy to underestimate the cost of good labor in a handiwork intensive situation such as tuba repair and restoration. There is a certain romance to finding a gem from early in the 20th century or late 19th century and sending it off to one of the master horn jockeys who are available. I still wish I had been able to buy that little Worcester (sp) Conn BBb from 1889 that was for sale here in March $500! And in good shape! Then send it to Herr Oberloh and.... My little $500 antique would now cost... $3500? $4000? More? I don't know... Still, it would have been cool.

Jeff "Pondering my navel again" Benedict
User avatar
Daniel C. Oberloh
pro musician
pro musician
Posts: 547
Joined: Fri Mar 19, 2004 9:22 pm
Location: Seattle Washington

Post by Daniel C. Oberloh »

Finally, more pics!
Image
The badly damaged 3rd, 4th and main slide crooks were completed recently and have finally been squared away and assembled. The new watter-keys are far better made then the originals, or what there was left of them. Still need to get them polished.
Image
The 5th and 6th branches were also addressed with the 6th being a bit of a bear. number 6 was badly kinked and the radius was distorted quite severely requiring it to be filled and reshaped following the dent work. the 6th branch dog-leg the connects to the master slide turned up issues that required straightening out the dog leg and re-bending it so it can clear the 4th valve branch.
Image
The inside branch sub-assembly has gone together nicely even though it required all new spacer-braces be fabricated. I made the new braces a tad more heavy because i never liked the rather spindly/wimpy look of the originals and mine fit better too. :D

I am now battling with the fitting of the bottom bow. Wish me luck.


Daniel C. Oberloh
Oberloh Woodwind and Brass Works
Saving the world, one horn at a time..
User avatar
Bandmaster
4 valves
4 valves
Posts: 778
Joined: Sat May 15, 2004 3:33 am
Location: Upland, CA
Contact:

Post by Bandmaster »

Now I am really getting anxious... :shock: It is starting to look like an actual tuba. The valve section is done and the branches are going together. All he will have left is to make a leadpipe and Dan will get to play it and tell me how it sounds. :D

Thanks Dan, it's looking great! Who knows, maybe I'll get it back in time for Tuba Christmas? Whoo-hoo!

Just a reminder as to what it used to look like...
Image
Dave Schaafsma
Image
1966 Holton 345 | 1955 York-Master | 1939 York 716 | 1940 York 702 | 1968 Besson 226 | 1962 Miraphone 186 | 1967 Olds | 1923 Keefer EEb | 1895 Conn Eb | 1927 Conn 38K | 1919 Martin Helicon
User avatar
Bandmaster
4 valves
4 valves
Posts: 778
Joined: Sat May 15, 2004 3:33 am
Location: Upland, CA
Contact:

Post by Bandmaster »

Bob1062 wrote:Man, that is SHINEY!!

Dave, you better never switch instruments! :D

What happens to the parts that won't be re-used (bows and the bell and whatnot)?
I don't plan to, I loved how it played before the restoration, but now it should really play nice. It played nice, but was embarassing to look at... :oops:

Only the bell and one small crook will not be used over again. We found another bell so Dan doesn't have to fix all those patches. But he said he could if he really had to... :shock:

Yes, this restoration will cost some bucks, but then I didn't pay much for the tuba in the first place, so I will still come out ahead.
Dave Schaafsma
Image
1966 Holton 345 | 1955 York-Master | 1939 York 716 | 1940 York 702 | 1968 Besson 226 | 1962 Miraphone 186 | 1967 Olds | 1923 Keefer EEb | 1895 Conn Eb | 1927 Conn 38K | 1919 Martin Helicon
User avatar
Wyvern
Wessex Tubas
Wessex Tubas
Posts: 5033
Joined: Fri Sep 01, 2006 7:00 pm
Location: Hampshire, England when not travelling around the world on Wessex business
Contact:

Post by Wyvern »

That outer tube in the latest pictures looks gold brass - is it?
User avatar
JohnMCooper
bugler
bugler
Posts: 96
Joined: Fri Mar 19, 2004 1:11 pm
Location: Costa Mesa, CA

Post by JohnMCooper »

Neptune wrote:That outer tube in the latest pictures looks gold brass - is it?
The copper looking tubes are plated up with copper to build up the tubes from much rework, filing, sanding, grinding, beating with a hammer and put material on there so that they could be sanded and polished smooth again.
Mirafone 184-4U BBb
Besson BE943 Bass T-Bone
1929 Conn 4H Tenor T-Bone
Selman Eb Alto T-Bone
Sioux Falls Canaries Baseball
tofu
5 valves
5 valves
Posts: 1998
Joined: Sun Mar 21, 2004 11:59 pm
Location: One toke over the line...

Post by tofu »

Bandmaster wrote: I don't plan to, I loved how it played before the restoration, but now it should really play nice. It played nice, but was embarassing to look at... :oops:
It will be interesting to hear your comments on how it plays after you get it back versus before the restoration. It likes like it will be a really fun horn to play.
User avatar
Tubaing
4 valves
4 valves
Posts: 536
Joined: Mon Jun 04, 2007 9:39 pm

Post by Tubaing »

tofu wrote: It will be interesting to hear your comments on how it plays after you get it back versus before the restoration. It likes like it will be a really fun horn to play.
If he still rembers.
Kevin Specht
Keep on Tubaing
User avatar
Bandmaster
4 valves
4 valves
Posts: 778
Joined: Sat May 15, 2004 3:33 am
Location: Upland, CA
Contact:

Post by Bandmaster »

Tubaing wrote:
tofu wrote: It will be interesting to hear your comments on how it plays after you get it back versus before the restoration. It likes like it will be a really fun horn to play.
If he still rembers.
Good point! :wink:

I guess I hope I will have same reaction I had when I played it for the first time 4 years ago.... oh wow!
Dave Schaafsma
Image
1966 Holton 345 | 1955 York-Master | 1939 York 716 | 1940 York 702 | 1968 Besson 226 | 1962 Miraphone 186 | 1967 Olds | 1923 Keefer EEb | 1895 Conn Eb | 1927 Conn 38K | 1919 Martin Helicon
User avatar
Daniel C. Oberloh
pro musician
pro musician
Posts: 547
Joined: Fri Mar 19, 2004 9:22 pm
Location: Seattle Washington

Post by Daniel C. Oberloh »

Hey All!
Dave and I visited on the phone the other day. He called at the time I was assembling the body and fitting the valve assembly. here are some pics of what has been accomplished since the last offering.

Image

As I am sure you can see the mouth-pipe is missing. I still need to make a new pipe for the horn and address the intonation.

Image

One of the things that bothers me on the BBb 345 is the placement of the valve block which is to far to the players left side of the instrument. I did a series of changes to the 6th branch and its "dog-leg" to the master tuning slide. I did this to center the valves for easier reach and to eliminate the excessively long and spindly braces that span between the 4th valve slide and top-bow. I like the more uniform appearance.

Image

The alteration was also to lower the valve section into the body, reducing the overall thickness of the body front to back.

Image

I still need to complete the polishing and engraving of the bell as well as a fair amount of clean-up overall but what has been completed thus far has been the lions share of the project. I will be taking a break on the horn once again to focus on other more pressing matters. Hope you like the pics Dave. Happy Holidays!

Daniel C. Oberloh
Oberloh Woodwind and Brass Works
Saving the world, one horn at a time...
User avatar
Tubaing
4 valves
4 valves
Posts: 536
Joined: Mon Jun 04, 2007 9:39 pm

Post by Tubaing »

:D :) :o :shock: :? :D :twisted: :P :tuba: wow.
Kevin Specht
Keep on Tubaing
User avatar
bort
6 valves
6 valves
Posts: 11223
Joined: Wed Sep 22, 2004 11:08 pm
Location: Minneapolis, Minnesota

Post by bort »

That's just amazing! (And boy does it look naked without a leadpipe! :))

Daniel C. Oberloh wrote: Image
User avatar
The Big Ben
6 valves
6 valves
Posts: 3169
Joined: Sat Dec 16, 2006 11:54 am
Location: Port Townsend, WA

Post by The Big Ben »

bort wrote:That's just amazing! (And boy does it look naked without a leadpipe! :))
Heck, *you'd* look pretty naked, too. Running around without a leadpipe.

Pretty amazing stuff to see all the pieces come together. I've been over to Dan's shop a number of times over the past year on other business and he's dragged me into the back room to see some little detail he was fiddling with. There is hand craftsmanship and pride with every piece of this thing. It really should become a hyphenated horn: Holton-Oberloh.

Jeff "No Hyphens" Benedict
User avatar
Bandmaster
4 valves
4 valves
Posts: 778
Joined: Sat May 15, 2004 3:33 am
Location: Upland, CA
Contact:

Post by Bandmaster »

Alas... it finally "looks" like a tuba! Image

Thanks for the photos Dan. It looks like I'll have it back in time for my Spring concerts. Image
Dave Schaafsma
Image
1966 Holton 345 | 1955 York-Master | 1939 York 716 | 1940 York 702 | 1968 Besson 226 | 1962 Miraphone 186 | 1967 Olds | 1923 Keefer EEb | 1895 Conn Eb | 1927 Conn 38K | 1919 Martin Helicon
User avatar
OldsRecording
5 valves
5 valves
Posts: 1173
Joined: Thu Feb 15, 2007 6:26 pm
Location: Agawam, Mass.

Post by OldsRecording »

:shock: :D Wow. I dig the two-tone finish. Kind of gives it that 'Olds Recording' look. :) You'll have to send us some sound files when you're done.
bardus est ut bardus probo,
Bill Souder

All mushrooms are edible, some are edible only once.
User avatar
greatk82
3 valves
3 valves
Posts: 422
Joined: Wed Aug 04, 2004 6:28 pm
Location: Bloomsburg, PA

Post by greatk82 »

OldsRecording wrote::shock: :D Wow. I dig the two-tone finish. Kind of gives it that 'Olds Recording' look. :) You'll
You have a two-tone finish?
Image
User avatar
The Big Ben
6 valves
6 valves
Posts: 3169
Joined: Sat Dec 16, 2006 11:54 am
Location: Port Townsend, WA

Post by The Big Ben »

OldsRecording wrote::shock: :D Wow. I dig the two-tone finish. Kind of gives it that 'Olds Recording' look. :) You'll have to send us some sound files when you're done.
It will be shiny silver when it is done. Dan describes the copper as the "skim coat before finish paint" to use auto body terms.

I agree- it will be beautiful when it is done.
Post Reply